Photographer’s Guide to the Golden Circle: Location, Timing and Tips
")
By Attila Balatoni
Local Travel Expert
Last updated: April 8, 2026
Intro

One of the reasons photographers love the Golden Circle is the range of landscapes found along the route. In a single day, you can photograph waterfalls, erupting geysers, geothermal landscapes, volcanic terrain, and some of Iceland’s most iconic scenery.
The challenge is rarely finding subjects. It is deciding where to spend your time.
The Photographer’s Guide to the Golden Circle highlights the best photography locations along the route and explains when to visit, what to shoot, and how seasonal conditions affect photography throughout the year.
Overview: Golden Circle Photography Guide
| Best locations: Þingvellir, Geysir, Gullfoss, Brúarfoss |
| Best time of day: early morning and late afternoon |
| Best season: autumn and winter for light and contrast |
| Best all-around location: Gullfoss |
| Most underrated photography stop: Skálholt |

Suggested Photography Timeline
A simple way to structure your day for the best light:
| Morning → Þingvellir soft light, fewer crowds |
| Midday → Geysir consistent eruptions and geothermal activity |
| Afternoon → Gullfoss excellent waterfall photography |
| Evening → Brúarfoss or Kerið softer light and calmer conditions |
On the Golden Circle, timing often has a greater impact on your photographs than camera equipment. Arriving before the busiest hours can make a bigger difference than any lens upgrade.
Golden Hour on the Golden Circle
Golden hour can completely transform the appearance of the Golden Circle. Softer light, longer shadows, and warmer tones often create far more interesting photographs than the harsher light found around midday.
During summer, the evening golden hour can last for several hours, creating exceptional conditions for landscape photography. In autumn and winter, lower sun angles throughout the day often provide similar opportunities without needing to wait until late evening.
Some of the most rewarding golden hour locations
•
Þingvellir viewpoints |
•
Kerið Crater |
•
Brúarfoss |
•
Skálholt |
For many photographers, light quality has a greater impact on the final image than camera equipment or lens choice.
Golden Circle Photograph Stops
Þingvellir National Park: Landscape Photography
Þingvellir offers wide landscapes, geological formations, and strong compositional lines.
Key subjects
•
Almannagjá Gorge |
•
Hakið viewpoint |
•
Þingvallavatn |
•
Þingvellir Church |
•
Rift valley landscapes |
Þingvellir is less about individual landmarks and more about the scale of the landscape itself.
While Öxarárfoss attracts much of the attention, many of the strongest compositions come from the wider views overlooking the rift valley. The combination of lava fields, cliffs, lakes, and open space creates opportunities that are very different from the waterfall photography found elsewhere on the route.

Photography tips:
•
use a wide-angle lens to emphasize scale |
•
shoot from Hakið for elevated perspectives |
•
use Almannagjá as a leading line |
•
include Þingvellir Church for context and scale |
Tip: If conditions are calm, spend a few minutes near Þingvallavatn. Reflections are never guaranteed, but on still mornings the lake can produce some surprisingly beautiful compositions.
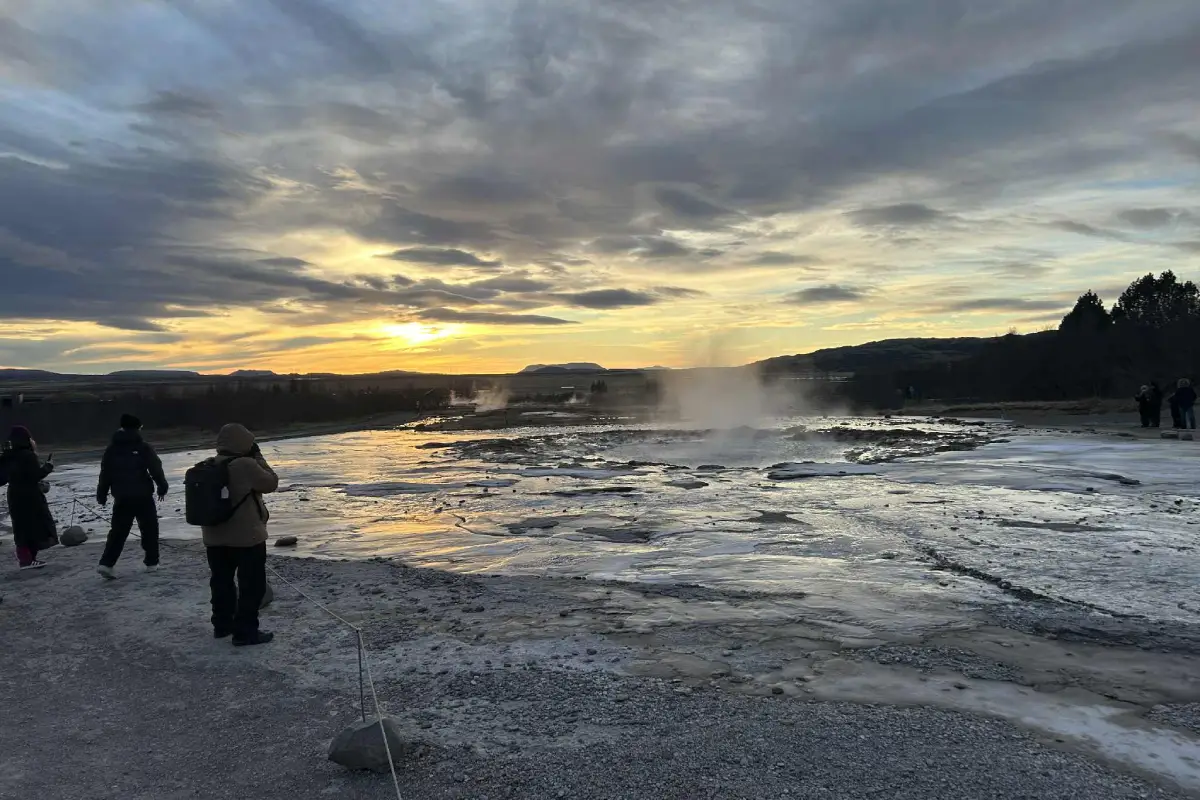
Geysir: Capturing Motion and Timing
Best time to shoot: Mid-morning or late afternoon
Key subjects
•
Strokkur geyser |
•
Steam vents |
•
Mud pools |
•
Geothermal textures |
The biggest challenge at Strokkur is not capturing the eruption itself.
It is creating an image that stands apart from the thousands of nearly identical photographs taken from the same viewing area every day.
Most visitors stand directly in front of the geyser waiting for the eruption. Stepping back and incorporating people, steam, and surrounding geothermal features often results in more distinctive photographs.

Photography tips:
•
prepare your composition before the eruption begins |
•
use burst mode during eruptions |
•
use a fast shutter speed to freeze water movement |
•
pay attention to wind direction |
Tip: Do not spend your entire visit photographing Strokkur. Many of the most atmospheric images at Geysir come from the smaller steam vents, colorful geothermal textures, and atmospheric steam surrounding the main attraction.
Gullfoss: Power and Scale
Best time to shoot: Afternoon or overcast conditions
Key Subjects
•
Upper falls |
•
Lower falls |
•
Canyon views |
•
Rainbows |
•
Water movement |
Gullfoss rarely looks exactly the same twice. Weather, water flow, and changing light can dramatically alter the appearance of the waterfall, encouraging many photographers to spend more time here than they originally intended.
The scale of the canyon is difficult to appreciate until you are standing beside it. The upper and lower viewpoints create very different compositions, making it worth exploring both if conditions allow.

Photography tips:
•
use an ND filter for long exposures |
•
bring a microfiber cloth for lens cleaning |
•
explore both viewing platforms |
•
look for rainbows on sunny days |
On sunny days, rainbows often appear in the mist, adding strong visual interest.
Tip: Waterfall mist reaches cameras surprisingly quickly at Gullfoss. Keep a lens cloth easily accessible rather than buried in your camera bag.
Other Excellent Photography Stops
Several lesser-known locations along the Golden Circle offer excellent photographic opportunities.
| Brúarfoss If you are looking for one location that consistently photographs well regardless of weather, Brúarfoss is hard to beat. The vivid blue water naturally becomes the focal point of the image, while the surrounding river creates strong leading lines. |
| Faxi Waterfall Often overlooked in favor of Gullfoss, Faxi offers a quieter environment and simpler compositions.It is an excellent stop if you want waterfall photographs without large crowds nearby. |
| Kerið Crater The contrast between red volcanic rock and blue water makes Kerið one of the most colorful photography locations on the Golden Circle. In our experience, it works best during early morning or late afternoon when shadows begin adding depth to the crater walls. |
| Friðheimar Tomato Farm The greenhouse interiors provide a photographic environment unlike anything else on the route. Warm light, repeating lines, and everyday moments create opportunities for environmental and documentary-style photography. |
| Skálholt Cathedral One of the most underrated photography stops on the Golden Circle.The cathedral and surrounding countryside create strong opportunities for architectural photography, particularly during changing weather conditions. |
Photography by Season
Each season offers different photographic conditions along the Golden Circle.
Summer
|
Autumn
|
Winter
|
Spring
|
In our opinion, autumn offers the best overall balance of light, color, and crowd levels for landscape photography.
Golden Circle Private Tour
Explore Þingvellir, Geysir and Gullfoss on a private guided Golden Circle tour from Reykjavík.
Golden Circle Private Tour
Essential Gear, Specs & Photography Tips
The Golden Circle rewards timing and patience far more than expensive equipment. Some of our favorite photographs have been taken during overcast skies, mist, or light rain, conditions that can create softer light and more atmospheric images than clear blue skies.
Helpful Gear
•
wide-angle lens (16–35mm) |
•
tripod |
•
polarizing filter |
•
ND filter |
•
lens cloth |
•
waterproof camera protection |
Typical Camera Settings
| Landscapes ISO: 100–200 Aperture: f/8–f/11 Shutter: adjust based on light |
| Waterfalls (long exposure) ISO: 100 Aperture: f/8–f/11 Shutter: 1–5 seconds (with ND filter) |
| Geysers (action shots) ISO: 200–400 Aperture: f/4–f/8 Shutter: 1/1000 or faster |
| Northern Lights (winter) ISO: 800–3200 Aperture: f/2.8–f/4 Shutter: 5–15 seconds |
Practical Photography Tips
•
arrive early when possible |
•
clean your lenses frequently |
•
protect your equipment from the mist |
•
be patient with changing light |
•
allow more time at locations than you think you need |
•
visit popular location outside midday when possible |
Tip: Some of our favorite photographs on the Golden Circle have come during weather that initially looked disappointing.Overcast skies often work beautifully at waterfalls, while light rain can enhance colors and reduce harsh contrast.
Our Favourite Photography Stops
If we were introducing a first-time visitor to Golden Circle photography, these are the locations we would prioritize first.
- Gullfoss
- Þingvellir
- Brúarfoss
- Geysir
- Kerið
Not because they are necessarily the most famous, but because they consistently offer the greatest variety of photographic opportunities throughout the year.
Golden Circle Photography FAQ
What is the best time to photograph the Golden Circle?
Early morning and late afternoon offer the best light and fewer crowds.
Do you need professional equipment?
No. A basic camera or even a smartphone can capture great images, though a tripod and filters improve results significantly.
What lens is best for the Golden Circle?
A wide-angle lens (16–35mm) is ideal for landscapes, while a zoom lens can help capture details and distant subjects.
Can you photograph the Northern Lights on the Golden Circle?
Yes. Locations like Þingvellir and the countryside near Gullfoss offer good conditions for aurora photography in winter.
Is the Golden Circle good for beginner photographers?
Yes. The locations are easy to access, and the variety of subjects makes it ideal for learning landscape photography.